My Blinkie

Popular Posts
-
TWILIGHT ORCHARD BLOG TRAIN! Welcome to my stop on the Twilight Orchard Blog Train! I hope you enjoy my free contribution inspired by cozy ...
-
 Here are more masks for you all they were supposed to be Halloween masks but don't necessarily need to use them like that.
 -
 This tutorial was written on August 19,2013 by me . Any similarities to other tutorials is purely coincidental.Please do not clai...
 -
 This tutorial was written on October 15 ,2013 by me . Any similarities to other tutorials is purely coincidental.Please do not claim as y...
 -
 This tutorial was written on January 6,2014 by me . Any similarities to other tutorials is purely coincidental.Please do not claim as y...
 -
 Hi all! I made this cluster last year for a challenge over at CM with the beautiful kit from Tiny Turtle Designs named "Raven" He...
 -
Welcome aboard the Midnight Garden Blog Train! 🌙 Click HERE to download my contribution to this enchanting blog train. Be sure to visit al...
-
This one is for all my spooky girlies who love a little mystery and a lot of witchy glam. Sorceress Enigma is moody, magical, and packed wi...
-
 Hi all, made some wordart, templates, and masks for the Misfits Blog Challenge over at Creative Misfits. There are tons of free goodies for...


Showing posts with label Tutorials PTU. Show all posts
Showing posts with label Tutorials PTU. Show all posts
Monday, January 6, 2014

This tutorial was written on January 6,2014 by me . Any similarities to other tutorials is purely coincidental.Please do not claim as your own.This tutorial writter assumes you have a working knowledge of using Paint Shop Pro.This tutorial was done in Paint Shop ProX4, but can be use in other Paint Shop Pro versions. Please link to this blog if used for Forum Challenges.
Materials needed:
Tube by Michele Ann I got this one when DSI was still opened but you can now purchase her work on ADI here
Scrap Kit: PTU "Immortal Love" by PinkParadox Productions
Font of your choice
*d/s=drop shadow, c/p= copy and paste
Lets Begin! Open up an image 700x700 . Open frame 13 and c/p to your canvas. Select inside your frame and go to modify, expand by 15. C/p paper 12 hit invert and delete. now place your tube in front of your frame layer and. Duplicate and on the top layer add Gaussian blur of 4 and set blend mode to overlay and the opacity to 70. Sharpen the bottom tube and add the following elements to your tag see mine for placement.
E 20,E 84, E 101,E 105,E 124, E 145.
Now add your copyrights and your name and that's it your finished! thanks for trying out my tutorial!

This tutorial was written on January 6,2014 by me . Any similarities to other tutorials is purely coincidental.Please do not claim as your own.This tutorial writter assumes you have a working knowledge of using Paint Shop Pro.This tutorial was done in Paint Shop ProX4, but can be use in other Paint Shop Pro versions. Please link to this blog if used for Forum Challenges.
Materials needed:
Tube by Anna Liwanag I got this one when PTE was still opened but you can now purchase her work on CDO
Scrap Kit: PTU "Enamorte 2-1" by Abstract Creations
Font of your choice
*d/s=drop shadow, c/p= copy and paste
Lets begin! Open up an image 700x700. Open elemen F1 and c/p in the middle of the canvas rezise to your liking. Now open up your tube and c/p in front of the frame layer. Now add the following elements to your tag and see mine for reference, I also added a d/s to all the layers.
e8, e11,e14,e19 and e15.
Now click on your frame layer and select the inside go to modify and expand by 10. c/p paper 2 and move to down so the frame layer is on top. add your copyrights and add your name and that's it your done! thanks for trying out my tut.
Monday, November 18, 2013

This tutorial was written on November 18,2013 by me . Any similarities to other tutorials is purely coincidental.Please do not claim as your own.This tutorial writter assumes you have a working knowledge of using Paint Shop Pro.This tutorial was done in Paint Shop ProX4, but can be use in other Paint Shop Pro versions. Please link to this blog if used for Forum Challenges.
Materials needed:
Tube: AR-Christmas Girls 8 by Al Rio which you can find at Artistic Dreams Imaging
Scrap Kit: PTU "Christmas Fairy" by Tiny Turtle Designs
Mask: Winter Mask 8 by Dee
Template: 21 by Leah
Font: YummyCupcakes, Quill
Filters:
Eye Candy 4000, Gradient Glow
*d/s=drop shadow, c/p= copy and paste
Lets Start! Open up the template. Press Shift + D and close the original. Delete the credits and I also deleted the ribbon layers and Christmas Word Art. Select Oval 3 and c/p paper 9. Select oval 2 and c/p paper 3. Select Rect 2 and rect 1 and c/p paper 38. Select Squares 1 and 2 and c/p paper 39 add Noise of 90 and sharpen. Select Oval 1 c/p paper 1. Add Gradient Glow of Fat and choose colors of your choice. I added it to all of the layers of the templates. except oval 1.
Add your tube and place it in the middle of the tag. Add the following elements and see my tag for placement.
Element 163
Element 159
Element 172
Element 152
Element 88
Element 16
Add a d/s of choice to all the elements. Now on the tube layers duplicate and add and Gaussian blur of 3 and Overlay and set opacity to 70 %. add d/s. Now for your mask c/p paper of choice and apply your mask. Add your copyright information. Add your name and that's it your done. thanks for trying out my tutorial!
Wednesday, October 30, 2013

This tutorial was written on October 30,2013 by me . Any similarities to other tutorials is purely coincidental.Please do not claim as your own.This tutorial writter assumes you have a working knowledge of using Paint Shop Pro.This tutorial was done in Paint Shop ProX4, but can be use in other Paint Shop Pro versions. Please link to this blog if used for Forum Challenges.
Materials needed:
Tube: Frankie by Spazzd which you can find at Spazzd Art
Scrap Kit: PTU matching kit "Frankie" by Sassi Designs
Mask: #69 by Simone
Font: Scriptina Pro
Filters:
Xero Radiance
Eye Candy 4000, Gradient Glow
Xenofex Constellation
Noise
*d/s=drop shadow, c/p= copy and paste
Lets Start! Open up an image 700x700 open Element 32 c/p and place towards the bottom of your canvas. Now open up your tube and place after Element 32. Re-size and duplicate on the top layer add Gaussian blur of 3 and Overlay with an opacity of 70%. On the bottom tube layer sharpen and add Xero Radiance of choice and add a d/s.
Now Open up Element 43 and place behind the tube layer re-size if necessary. Add the following elements to your tag. See my tag for reference.
Element 6
Element 7
Element 11
Element 96
Element 97
Now on elements 96 and 97 I added the filter Constellation with the following settings

Now Open up paper 1 and apply your mask. Move to the bottom now open up element 70 and move after the mask layer. Add your copyrights. Now for the name I put mine in a light gray and added noise of 30 uniform and Monochrome checked.Then added a gradient glow in black and sharpened the layer and added a d/s. And that's it!! your done! thanks for trying out my tutorial. Any questions or comments are welcomed.
Tuesday, October 15, 2013

This tutorial was written on October 15 ,2013 by me . Any similarities to other tutorials is purely coincidental.Please do not claim as your own.This tutorial writter assumes you have a working knowledge of using Paint Shop Pro.This tutorial was done in Paint Shop ProX4, but can be use in other Paint Shop Pro versions. Please link to this blog if used for Forum Challenges.
Materials needed:
Tube: Ms. Thorn by Redfill which you can find at PicsForDesign
Scrap Kit: PTU kit BCA: A Girl's Heart by PinkParadox Productions
Mask: Vix_BigMask019
star brushes of choice
Font: Monika, Carpenter ICG
Font: Monika, Carpenter ICG
Filters:
Xero Radiance
Eye Candy 4000, Gradient Glow
Screen Works-Net Pattern
Noise
*d/s=drop shadow, c/p= copy and paste
Lets Start! Open up an Image 700x700. Add Frame 9, Select inside the frame and Expand by 10 then invert. Now add paper 21 and position it after the frame layer. Hit delete and deselect. Now on the paper layer add Screen Works - Net Pattern .
Add Element 123 and resize to fit on top of frame. Add your tube and erase the bottom so it looks like she's coming out of the frame. Duplicate tube layer and on the top layer add Gaussian blur of 3 and Overlay with an opacity of 70%. Add Xero Radiance of 245,55,97,192.
Select element 8 c/p in front of E 123. Add Element 44 and place towards the bottom of the layers. Add Element 166 in front of the tube layer. Now to add the word Survivor. I used the font Monika but you can choose any other tube you'd like. Choose your color and add Noise of 40 gaussian and monochrome selected. Now add Eyecandy 5 gradient glow of your choice and Sharpen. Add your name and copyrights and that's it your done! thanks for trying out my tutorial!

This tutorial was written on October 15 ,2013 by me . Any similarities to other tutorials is purely coincidental.Please do not claim as your own.This tutorial writter assumes you have a working knowledge of using Paint Shop Pro.This tutorial was done in Paint Shop ProX4, but can be use in other Paint Shop Pro versions. Please link to this blog if used for Forum Challenges.
Materials needed:
Tube: Sweet Pink by Nocturne which you can find at PicsForDesign
Scrap Kit: PTU kit BCA: A Girl's Heart by PinkParadox Productions
Mask: Vix Mask 362
star brushes of choice
Font: Connected
Font: Connected
BCA Word Art here
Filters:
Xero Radiance
Eye Candy 4000, Gradient Glow
*d/s=drop shadow, c/p= copy and paste
Let's Begin!Open up an image 700x700. Open element 154 and resize by 110.Select inside the image and expand by 10. Now select paper 12, c/p as new layer Invert and delete and deselect. Add your tube of choice and erase bottom so it can look as if she's coming out of the frame. Duplicate and on the top layer add Gaussian blur of 3 and Overlay to 70 % opacity. Add Xero Radiance of 245,55,97,192
Add Element 123 resize to your liking. Add the following elements and see my tag for placing
Element 2
Element 5
Element 42
Element 44
Element 147
Element 166
Add the word art. Now select paper 4 copy and paste as new layer and move to the bottom of all the layers. Add mask. Now add your name and copyrights and that's it your done. Hope you liked this tutorial!
Friday, September 27, 2013

This tutorial was written on September 27,2013 by me . Any similarities to other tutorials is purely coincidental.Please do not claim as your own.This tutorial writter assumes you have a working knowledge of using Paint Shop Pro.This tutorial was done in Paint Shop ProX4, but can be use in other Paint Shop Pro versions. Please link to this blog if used for Forum Challenges.
Materials needed:
Tube: Witch Runa by Misticheskaya which you can find at PicsForDesign
Scrap Kit: PTU kit "13 Spookie Street "by PinkParadox Productions
Mask Monti's Circle Mask
star brushes of choice
Font: CF Anabelle
Font: CF Anabelle
Filters:
Xero Radiance
Eye Candy 4000, Gradient Glow
Screenworks -Dot Screen
*d/s=drop shadow
Lets Begin! Open up a new image 700x700. Select Element 197 and place in the middle of the canvas. Now place your tube in front of of Element 197. Resize to your liking and duplicate, Adjust Blur to 3. Set blend mode to Overlay with an opacity of 70%. On the bottom layer Sharpen the image and add Xero Radiance of 49,50,178,158 or just hit the random button until you find one that you like. Now add a d/s of choice. Now we add the rest of the elements! see my tag for placement.
E 14
E 41
E 55
E 116
E 146
E 160 duplicate
E 177
E 169
Once All the elements are in place Select paper 39. Add the mask. Now go add the the Dot Screen fiter. Here is were you can add your sparkly brushes of choice. I can't provide you with the one's I used because I don't remember were I got them from. Add the Copyright information. Now add your name I added added Noise of 37 and sharpened, then add a gradient glow to Medium Black. and that's it! thank you for trying out my tutorial!
Sunday, September 15, 2013

This tutorial was written on September 15,2013 by me . Any similarities to other tutorials is purely coincidental.Please do not claim as your own.This tutorial writter assumes you have a working knowledge of using Paint Shop Pro.This tutorial was done in Paint Shop ProX4, but can be use in other Paint Shop Pro versions. Please link to this blog if used for Forum Challenges.
Materials needed:
Tube: Daily Report by Ida Larsen bought when she was with DSI
Scrap Kit: PTU kit "Autumn Symphony "by PinkParadox Productions
Mask 451 by Vix
star brushes of choice
Font: Scriptina Pro
Font: Scriptina Pro
Filters:
Xero Radiance
Eye Candy 4000, Gradient Glow
Eye Candy 5 Impact, Glass
Lets begin!
Open up an Image 700x700. Select Frame 4 and place in the middle. Now with your magic wand tool click inside the frame and go to Select, Modify and Expand by 15. Open paper 26 and copy and paste as a new layer Invert and delete and Select none. Now open up your tube and place in the middle erase from the bottom so we can see the frame. Now place the following elements, see my tag for placement.
Element 6
Element 7
Element 14
Element 32
Element 114
Element 127
Add glass filter of choice to Element 14, and a d/s. Now that everything is in place select your tube layer duplicate on the top layer add gaussian blur of 3 put it as overlay and set opacity to 70. Now Sharpen the bottom layer and add Radiance of choice. Select paper 21 and add the mask. Now add your copyright info. Now for your name I just Added a gradient glow set to medium and the color to white, then added a d/s. and that's it were done. Hope you enjoyed this tutorial!
Friday, August 16, 2013

This tutorial was written on August 16,2013 by me . Any similarities to other tutorials is purely coincidental.Please do not claim as your own.This tutorial writter assumes you have a working knowledge of using Paint Shop Pro.This tutorial was done in Paint Shop ProX4, but can be use in other Paint Shop Pro versions. Please link to this blog if used for Forum Tutorials
Materials needed:
Tube: Cassandra by Verymany which you can purchase at SATC
Kit: Island Sunset by PinkParadox Productions which you can get at PFD
Mask of choice
Font: Invitation Script
Filters:
Xero Radiance
Eye Candy 4000, Gradient Glow
Noise
Lets Begin!
Open up an Image 700x700 you can resize later. Open up Element 67 resize and place towards the middle. Add a drop shadow of choice.Open up your tube copy and paste as a new layer, resize. Add the following elemets see my tag for placement.
Element 80
Element 84
Element 92
Element 99
Element 106
Element 117 (x2)
Element 118 (x2)
Element 119 (x2)
Element 125
Element 126
Element 150
Add brushes of choice. Select paper 17 add mask of choice. On your tube layer duplicate, Add gaussian blur of 4. Blend I used Overlay with the opacity set to 70. On your original layer add Xero Radiance of choice. I used 209,67,27,194. Add drop shadow of choice. Add your name, select as Raster layer. Apply noice I used Noise of 46. Random checked and Monochrome unchecked. Add Gradient Glow of 4 medium and a glow of choice. Add drop shadow. Add the copyright info and that's it! Thank you for trying this tutorial!
Saturday, June 29, 2013

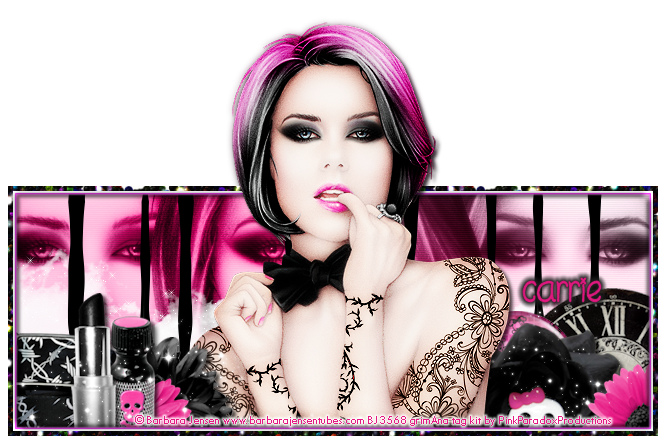
This tutorial was written on June 29,2013 by me . Any similarities to other tutorials is purely coincidental.Please do not claim as your own.This tutorial writter assumes you have a working knowledge of using Paint Shop Pro.This tutorial was done in Paint Shop ProX4, but can be use in other Paint Shop Pro versions. Please link to this blog if used for Forum Tutorials
Materials needed:
Tube: Teena Teese by Barb Jensen which you can purchase here
Kit: Girly Goth by PinkParadox Productions
Font: I love what you do
star brushes of choice
Filters:
Xero Radiance
Effects,Blinds
Eye Candy 4000, Gradient Glow
Eye Candy5, Gradient Glow
Lets Begin!
Open up a new image 650x250. flood fill with gradient of choice. I choose two colors form the tube. now go to Effect-Texture Effects-and choose the blinds of your choice.Now copy and paste tube CU,duplicate 2 times so you 3 CU of your tube, arrange to your liking. Merge the CU together and change the color to gray. Duplicate and on the top layer go to Adjust Blur and Gaussian Blur of 3. Blend mode to Soft light. On the bottom one sharpen and add Xero Radiance of choice. Blend mode to Luminance (Legacy) and change the opacity to 70%. Copy and paste main tube to the middle. Now for the elements. See my tag for placement you can add a drop shadow of choice as you go.
element 187
element 167
element 79
element 76
element 113
element 116 duplicate
element 55
elemet 13
element 51
element 48
Now make sure your main tube is on top of all the elements,then duplicate. On the top layer gaussian blur of 3 and blend to soft light. On the bottom one sharpen and add Xero Radiance again, add a drop shadow. On a new layer on top of your tube select all and flood fill with black add noise, modify-contract to 5, Invert and delete & deselect. then go to Eye candy 5 and select gradient glow the settings for mine are as following

Now go to Adjust canvas size to 650x450 again make sure your tube is on top and carefully erase anyparts that are sticking out from the bottom. add your copyright info and your name. Now for the name I left it plain but with a gradient glow of medium and the color black.
Avatar:
For the Avatar open a new image 120x200. Fill with the same gradient and add the same blinds effect you did on your banner. Copy and paste your tube duplicate and add same effects you did to you banner. add any elements you wish. When your done add a new layer and flood fill with black. add noise and select all modify-contract to 5, Invert and delete & deselect add the same gradient glow effect you did to the banner and add the copyrights.
That's it your done! thank you for trying my tutorial hope you liked it.
Friday, June 7, 2013

This tutorial was written on June 7,2013 by me . Any similarities to another tutorial is purely coincidental.Please do not claim as your own.This tutorial writer assumes you have a working knowledge of using Paint Shop Pro.This tutorial was done in Paint Shop ProX4, but can be use in other Paint Shop Pro versions. Please link to this blog if used for Forum Tutorials
Materials needed :
Kit: Grave Obsessions by PinkParadox Productions
Tube: Goth girl this is an Exclusive tube from Alfadesire and you can get it at Pictures for Design
Font: Signaw
Filters :
Font: Signaw
Filters :
Xero:Radiance
Effects: Blinds
Lets Begin!
Open up a new image 700x700 you can re-size later. Open frame 6 copy and paste as new layer. select the magic wand tool and select inside the the frame. Modify, Expand by 15. Don't de-select Choose a gradient of choice I used two colors from the tube. New layer flood fill and Move gradient under the frame. Go to Effects Blinds and add effect of choice. Select none. Copy your tube as a new layer and set above the gradient. change the color to gray. Blend mode to Luminance Legacy and set the opacity down to 70%.Now go to Xero Radiance of choice . Give your frame a shadow of choice I use 2,2,70,5 with the color set to black.
copy your tube again and re-size. Duplicate, Gaussian Blur to 3, and give it a Radiance of choice add a shadow of choice as well.
Now for the Elements used see my tag for placement:
Element 86
Element 70
Element 28
Element 68
Element 84
Element 109
Add your name and copyright save and your done!
Thanks for trying my tutorial hope you like it I would love ot see any creations made so don't be shy and drop my and email at grimana22@gmail.com
Subscribe to:
Posts
(Atom)
About Me

- Ana Grimaldo
- Hi I'm Ana or grimAna. I'm a mother of 3. I love tagging, reading, drawing and I love anything to do with homemade things or DIY!
Proud Member


